🐷 Tutorial 4 - Button
In many electronic projects, buttons are a common way to provide user input. In this tutorial, we’ll learn how to use a button with the Raspberry Pi Pico microcontroller board. We’ll write a Micropython program that reads the button’s state and prints a message when it is pressed.
Components Needed
| Component | Quantity |
|---|---|
| Raspberry Pi Pico W | 1 |
| Micro USB Cable | 1 |
| Breadboard | 1 |
| Wires | Several |
| Button | 1 |
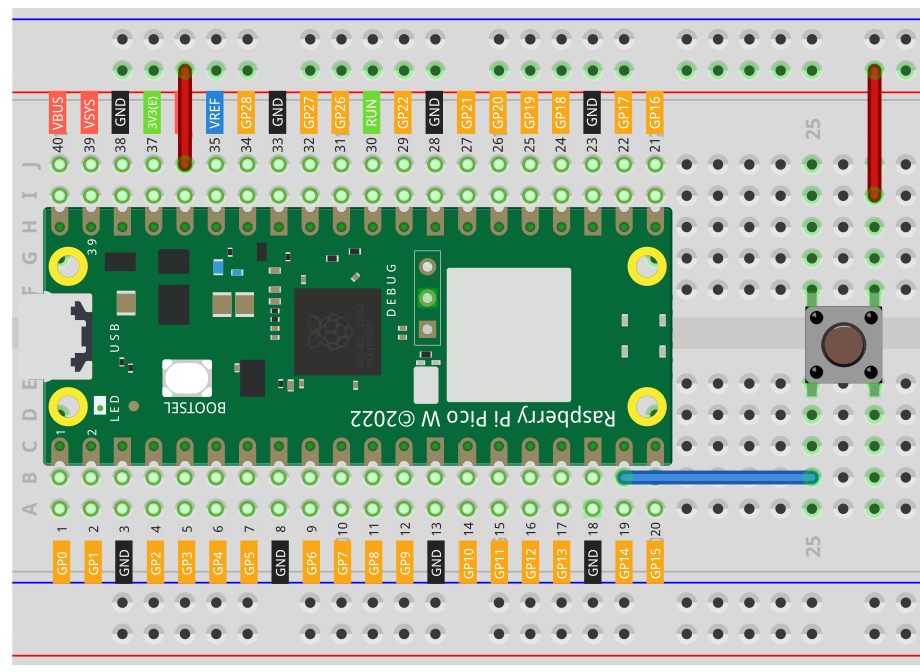
Fritzing Diagram - Active High
Code
from machine import Pin
import utime
button = Pin(14, Pin.IN, Pin.PULL_DOWN )
while True:
    if button.value() == 1:
        print("You pressed the button!")
        utime.sleep(1)
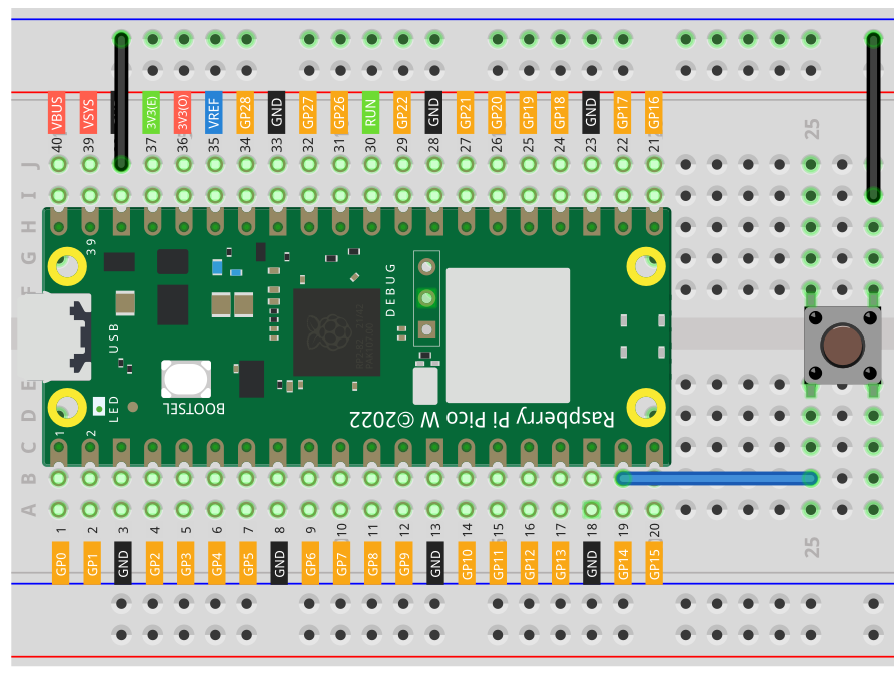
Fritzing Diagram - Active Low
Code
from machine import Pin
import utime
button = Pin(14, Pin.IN, Pin.PULL_UP )
while True:
    if button.value() == 0:
        print("You pressed the button!")
        utime.sleep(1)
Code Explanation
from machine import Pin
import utime
This code imports the Pin class from the machine module, which allows us to control the input and output pins on the Raspberry Pi Pico. The utime module is also imported, which allows us to pause the program for a specified amount of time.
button = Pin(14, Pin.IN , Pin.PULL_UP / Pin.PULL_DOWN)
This code sets up pin 14 as an input pin, which will be used to read the state of the tilt switch. The Pin.IN argument specifies that the pin should be set up for input. We have the choice to either pull the pin to High or Low by using either PULL_UP or PULL_DOWN class.
while True:
    if button.value() == 1:
        print("You pressed the button!")
        utime.sleep(1)
while True:
    if button.value() == 0:
        print("You pressed the button!")
        utime.sleep(1)
This code continuously loops while the program is running, checking the state of the button. The button.value() method returns the current state of the button, which is either 0 or 1. If the button is tilted or closed, the value will be 0 or 1 depending on which setup we used
If the value of the button is 0 or 1, the program prints a message to the console indicating that the switch is working. It then pauses for one second using the utime.sleep(1) function call.
The program will continue to loop and check the state of the button as long as the program is running.