Tutorial 2- LED Control
In this hands-on tutorial, we will learn how to connect an LED to the Raspberry Pi 5 and control its operation. This project is the fundamental introduction to electronics, which is similar to the Hello World program in programming.
YouTube Video
Introduction
Introduction Turning an LED on and off is often referred to as the “Hello World” program of hardware programming. This is because it is a simple, fundamental task that can be used to demonstrate basic programming concepts and test that the hardware is working correctly.
By writing a program that turns an LED on and off, developers can learn how to set up and control a digital output pin, and how to use timing functions like sleep to create a specific pattern of on and off cycles. This foundational knowledge can then be applied to more complex projects, such as controlling motors or sensors, building robots, or creating interactive installations.
In short, the LED blinking program is a simple, but powerful introduction to the world of hardware programming and can serve as a starting point for learning more about microcontrollers and embedded systems.
Components Needed
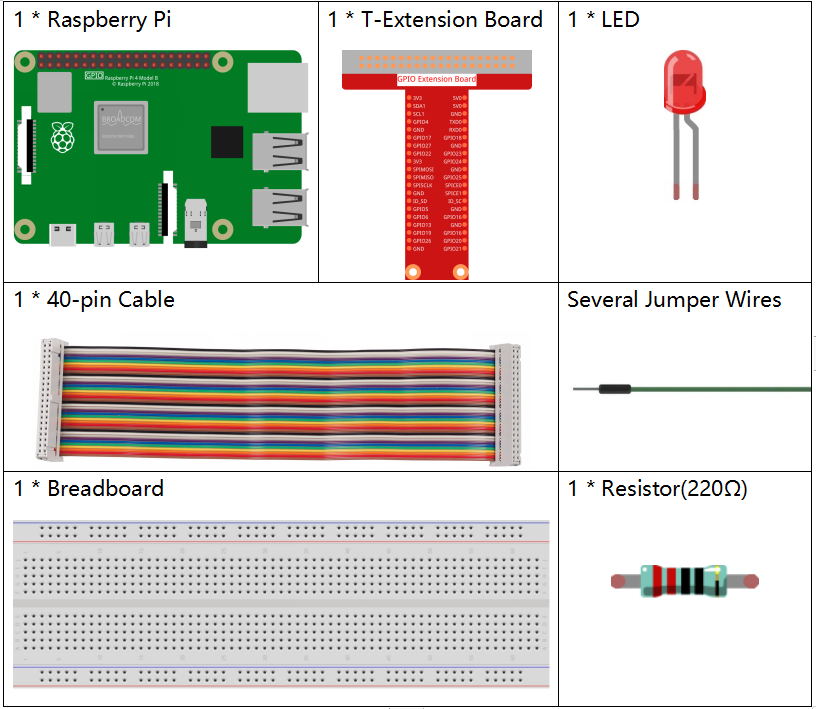
| Component | Quantity |
|---|---|
| Raspberry Pi 5 | 1 |
| Breadboard | 1 |
| Wires | Several |
| LED | 1 |
| 300 - 1K Ohm Resistor | 1 |

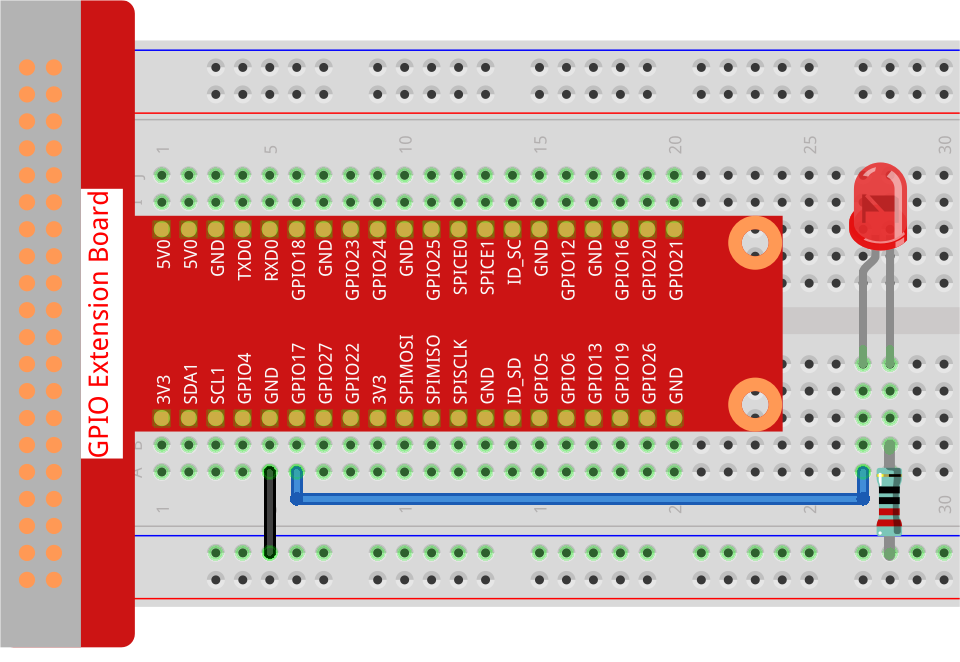
Fritzing Diagram
Connect the LED to your Raspberry Pi as shown in the following diagram.

Code
from gpiozero import LED
from time import sleep

# Initialize an LED connected to GPIO pin 17 using the GPIO Zero library.
led = LED(17)


while True:
    # Turn on the LED and print a message to the console.
    led.on()
    print('LED ON')

    # Wait for 0.5 seconds with the LED on.
    sleep(0.5)

    # Turn off the LED and print a message to the console.
    led.off()
    print('LED OFF')

    # Wait for 0.5 seconds with the LED off.
    sleep(0.5)
Code Explanation
Importing Libraries
from gpiozero import LED
from time import sleep
from gpiozero import LED: This line imports the LED class from the gpiozero library, which is a simple and easy-to-use library to control GPIO devices on a Raspberry Pi. from time import sleep : This imports the sleep function from the time module, enabling us to pause the execution of the program for a specified amount of time.
Initializing the LED
led = LED(17)
led = LED(17): Here, an instance of the LED class is created and assigned to the variable led. This instance is connected to GPIO pin 17 on the Raspberry Pi. This means our program will control an LED connected to that specific pin.
Infinite Loop
while True:
while True: : This starts an infinite loop, allowing the code inside it to run repeatedly until the program is manually stopped (e.g., by pressing Ctrl+C).
Turning the LED On
led.on()
print('...LED ON')
led.on(): This method turns on the LED that is connected to GPIO pin 17. print(’…LED ON’) : This outputs the message “…LED ON” to the console, indicating that the LED has been turned on.
Delay After Turning On
sleep(0.5)
sleep(0.5): This pauses the execution of the program for 0.5 seconds while the LED remains on. It effectively keeps the LED illuminated for this duration.
Turning the LED Off
led.off()
print('LED OFF...')
led.off(): This method turns off the LED. print(‘LED OFF…’) : This outputs the message “LED OFF…” to the console, indicating that the LED has been turned off.
Delay After Turning Off
sleep(0.5)
sleep(0.5): Similar to the previous sleep(), this pauses the program for another 0.5 seconds while the LED remains off.
Summary
This code creates a simple blinking LED effect by turning the LED on for 0.5 seconds, turning it off for 0.5 seconds, and repeating this cycle indefinitely. The printed messages help in tracking the state of the LED in the console.
Feel free to ask if you need further clarification on any part!