Tutorial 3 - Knight Rider LEDs
YouTube Video
Introduction
In this project, we’ll build a classic Knight Rider / LiDAR-style LED scanner on the ESP32-S3 Pico using MicroPython. You’ll learn to set GPIO pins as outputs, loop over them in order, and create a simple back-and-forth animation.
Components + Tools Breakdown
| Component | Quantity | Notes | |
|---|---|---|---|
| ESP32-S3 Pico (Waveshare) | 1 | Main microcontroller | |
| 5 mm LEDs | 8 | Any color | |
| 220–1000 Ω resistors | 8 | One per LED | |
| Breadboard + jumper wires | 1 | Prototyping | |
| USB-C cable | 1 | Power + flashing |
| Tools / Equipment | |
|---|---|
| Computer with Thonny (MicroPython) |
Wiring / Breadboard
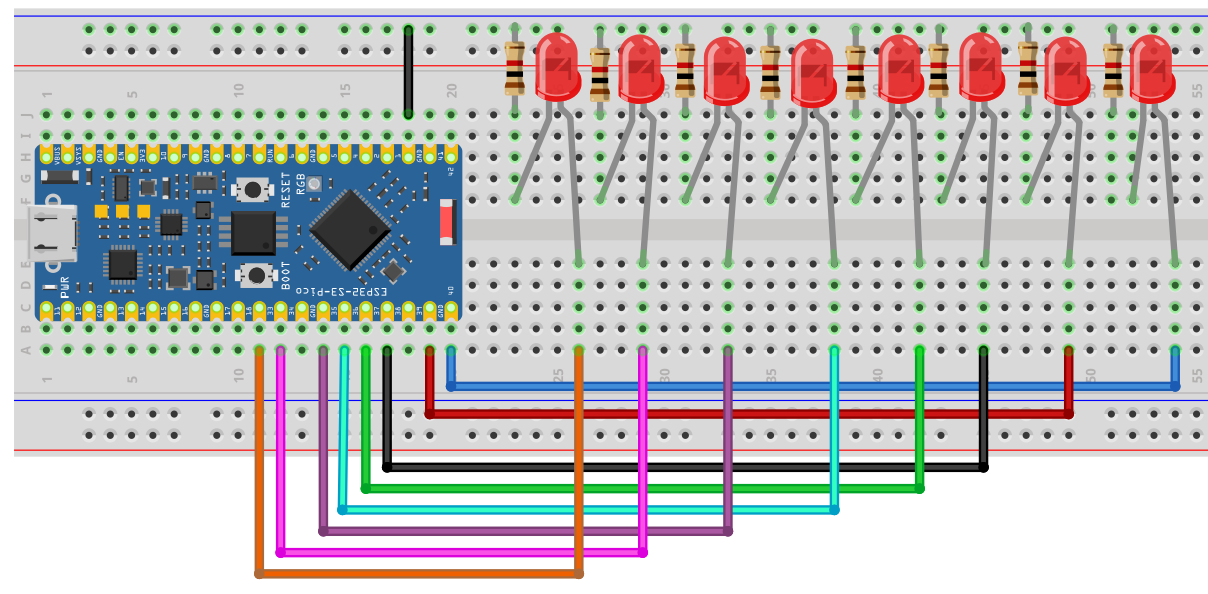
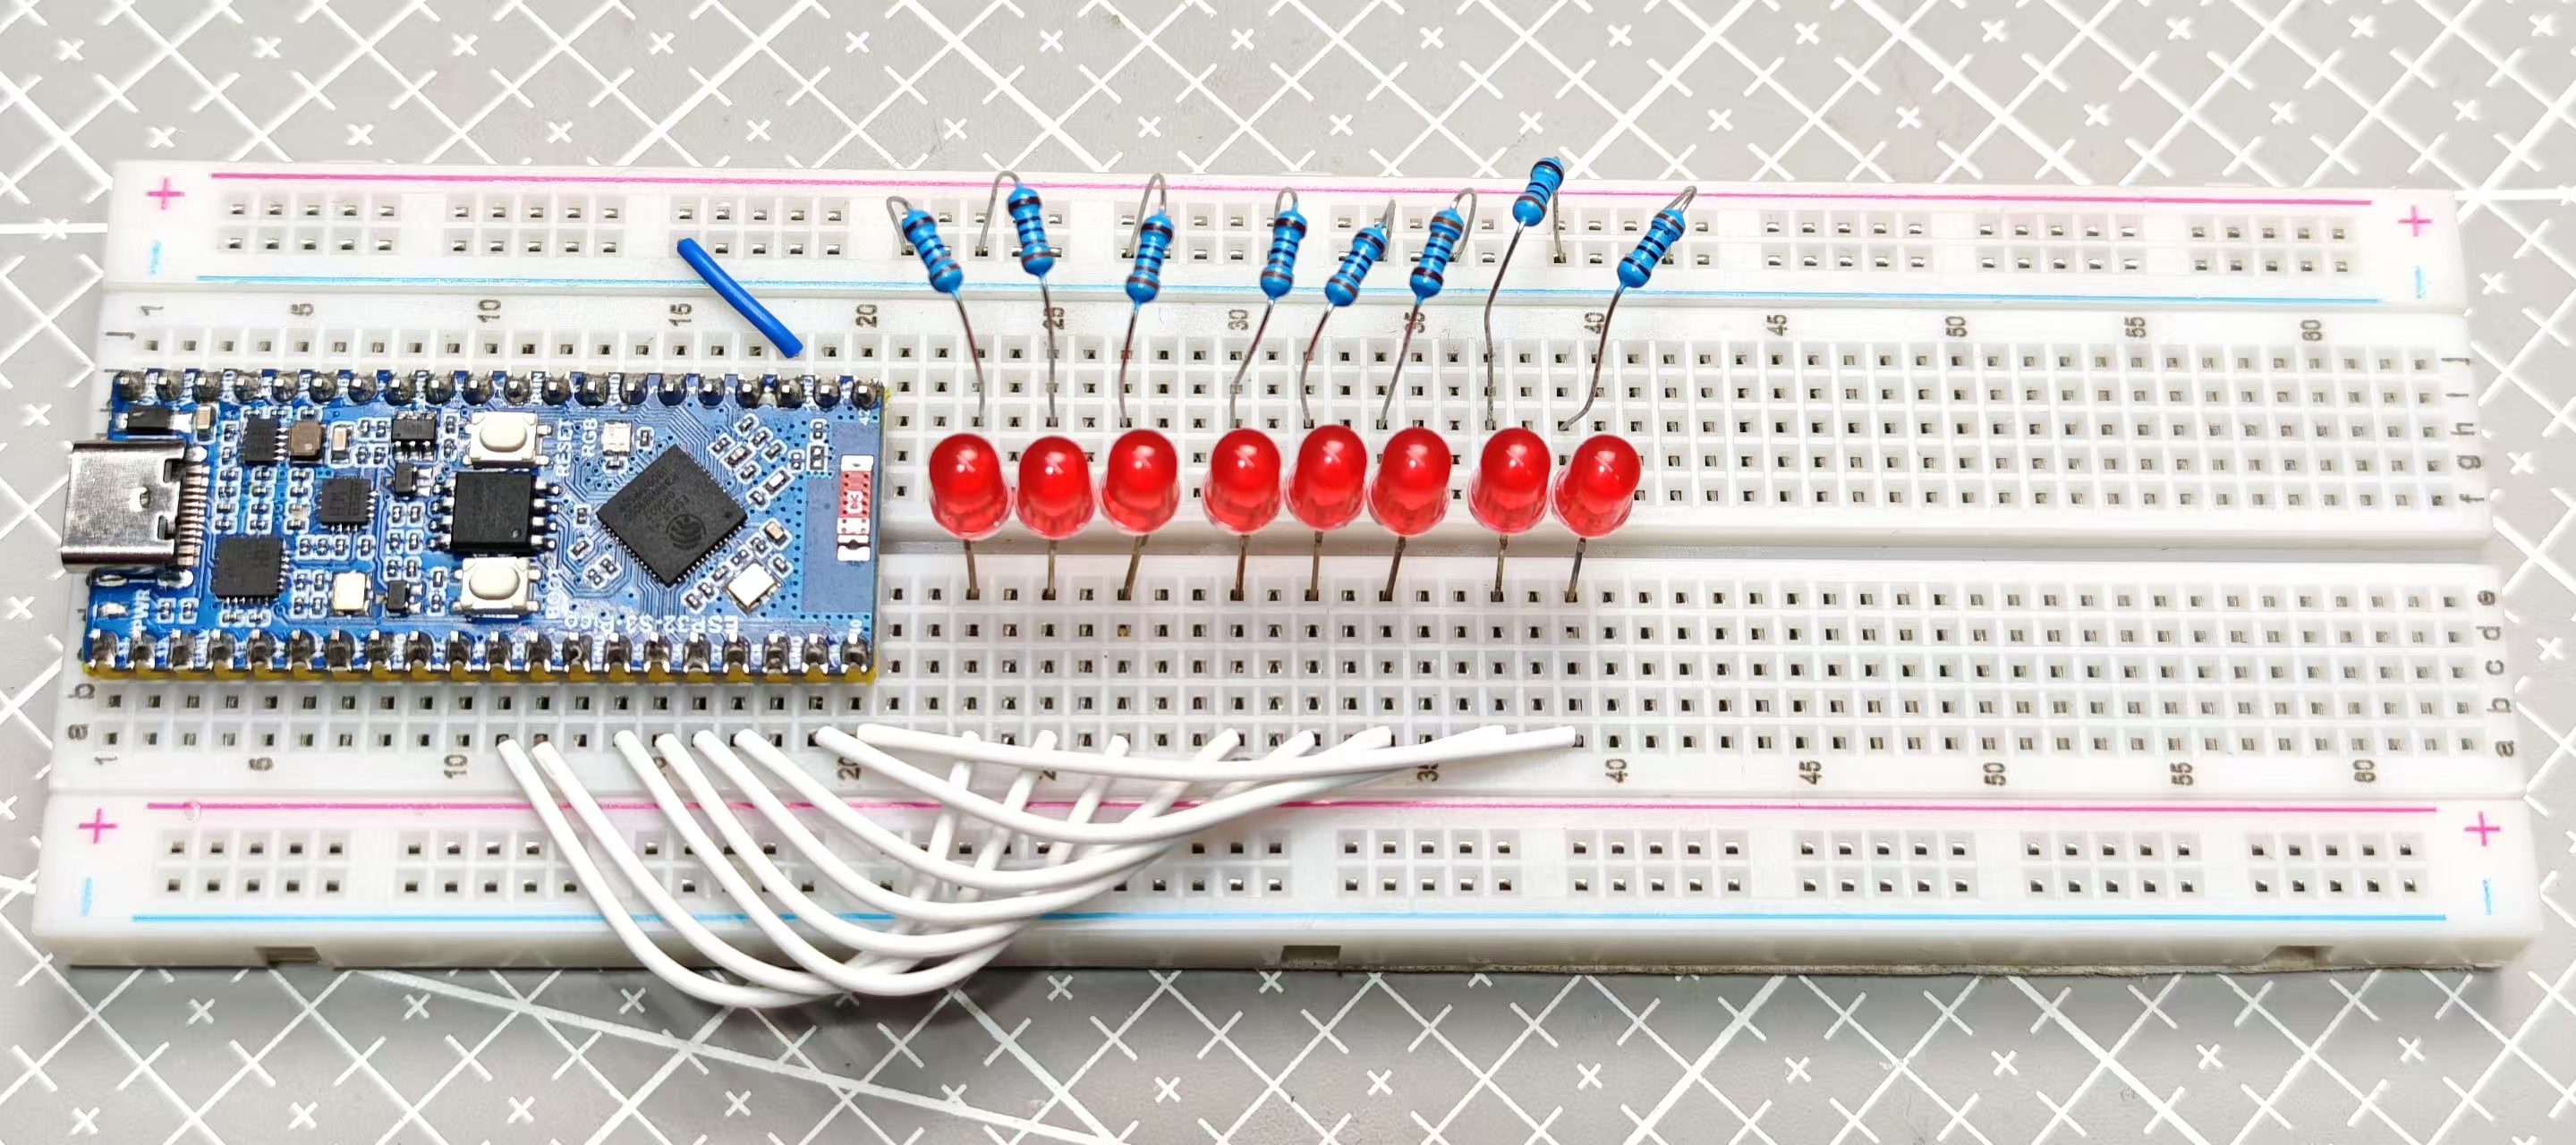
We’ll drive 8 LEDs with the ESP32-S3 Pico. Wire LEDs (with series resistors) to these GPIOs from left to right:
33, 34, 35, 36, 37, 38, 39, 40
Tip: The order matters for the animation. Arrange your LEDs physically left→right to match the list.
Code
# Knight Rider / LiDAR Scanner
from machine import Pin
import utime

# LED pins left → right
LED_PINS = [33, 34, 35, 36, 37, 38, 39, 40]

# Delay between steps
STEP_DELAY = 0.05

# Setup
leds = [Pin(p, Pin.OUT) for p in LED_PINS]
n = len(leds)

def all_off():
    for led in leds:
        led.value(0)

while True:
    # Left to right
    for i in range(n):
        all_off()
        leds[i].value(1)

        if i > 0: leds[i-1].value(1)
        utime.sleep(STEP_DELAY)

    # Right to left
    for i in range(n-1, -1, -1):
        all_off()
        leds[i].value(1)

        if i < n-1: leds[i+1].value(1)
        utime.sleep(STEP_DELAY)
Code – Breakdown
Imports
# Knight Rider / LiDAR Scanner
from machine import Pin
import utime

# LED pins left → right
LED_PINS = [33, 34, 35, 36, 37, 38, 39, 40]

# Delay between steps
STEP_DELAY = 0.05

# Setup
leds = [Pin(p, Pin.OUT) for p in LED_PINS]
n = len(leds)

def all_off():
    for led in leds:
        led.value(0)

while True:
    # Left to right
    for i in range(n):
        all_off()
        leds[i].value(1)

        if i > 0: leds[i-1].value(1)
        utime.sleep(STEP_DELAY)

    # Right to left
    for i in range(n-1, -1, -1):
        all_off()
        leds[i].value(1)

        if i < n-1: leds[i+1].value(1)
        utime.sleep(STEP_DELAY)
- Two simple
forloops sweep the “head” LED across the strip and back. - The neighbor LED creates a tiny “tail” effect. Comment it out for a single dot.
Troubleshooting
- Nothing lights up: Check you have a common ground and your pin numbers match the code.
- Backwards direction: Reverse the order in
LED_PINS. - Too fast/slow: Tweak
STEP_DELAY. - Random flicker: Ensure each LED has a series resistor (220–330 Ω is typical).
Optional Upgrades
- Longer tail (light 2 neighbors on each side)
- PWM fading for a smooth “comet” effect
- Add buttons or a potentiometer to control speed
- Use an RGB strip (NeoPixel) for a color scanner
Conclusion
That’s it! You’ve built a classic Knight Rider scanner on the ESP32-S3 Pico. If you have questions, drop a comment on the video—and while you’re there, consider subscribing to NerdCave for more beginner-friendly builds.